Saturday, February 28, 2009
Chop Suey
I never had the good fortune to meet Sweetie-Pi's mother. When speaking of her, everyone I've ever met who knew her, gets that far away look, reminisces with a far away smile and begins describing her, "She was the grandest lady...."
When was the last time you heard a woman described as a lady? It's an old fashioned word with deep connotations. Sweetie-Pi's friends go on to describe her as elegant, fun, beautiful, gracious, loving, welcoming. But they always start out saying, "She was the grandest lady.... "
This recipe was prepared by Sweetie-Pi's mother decades ago. I'm fortunate enough to have her recipe card, written in her own small, well-formed printing. The recipe, like her, is something to remember. It's my pleasure to share it with you as she wrote it.
Chop Suey
1 cup leftover pork, beef, or chicken
1 cup chopped celery
1/2 cup (or more) onion, cut fine
1 tablespoon sugar
2 tablespoons shortening
2 tablespoons soy sauce
1 cup water
1 can bean sprouts
salt, pepper, flour
Heat shortening and fry meat, celery and onions for 5 minutes. Then add sugar, soy sauce, and water. Cover and simmer 10 minutes. Add bean sprouts, season with salt and pepper. Thicken with flour and cook 10 to 15 minutes.
Now let me add my own remarks. I've only made this with chicken. I think two tablespoons of soy sauce is not enough; I probably give the soy sauce at least a couple more hearty shakes. (Sweetie-Pi adds more at the table but he has those salt-craving taste buds.)
I make a slurry of the flour and water to remove any disagreeable lumps. If the sauce is too thick, either add a couple more shakes of soy sauce or a splash more water. Conversely, if it looks too thin, make another small batch of slurry, (a couple teaspoons of water to a quarter cup of water). Add carefully, stirring well in between, giving the flour an opportunity to do its job.
We also add a small can of drained water chestnuts. I don't like them and pick them out, but Sweetie-Pi loves them. And lastly, I do not cook for 10-15 minutes at the end. I like my vegetables tender crisp, so once the sauce has thickened, I might let it go another minute or two, but I consider it done.
I served this with rice, but it's also very good with chow mein noodles. Rice is better for you, but the chow mein noodles are fun!
Sunday, February 22, 2009
Old Fashioned Raspberry Muffins
When I arose this morning, the sky was heavy with leaden clouds, the air was cold damp, and our five cats were acting all crazy, erupting from corners, chairs, and tables, chasing each other. Snow was sure to be imminent.
I've had raspberries in the freezer for a little while and thought it would be a nice treat to make raspberry muffins. I bet I have close to a hundred cookbooks and not one of them had a raspberry muffin recipe in it. Can you believe that? Me neither. I think I need another cookbook!
A quick search, and I found this gem on RecipeZaar. I cannot tell you how much we enjoyed these muffins this morning. Ordinarily I would wait to post, but these were so good I just had to share it with you as soon as I could!
Now the directions say to use the paper cupcake holders, which I did not do; I rarely use them. I have an unattractive trait called arrogance which too often prohibits me from taking good advice. I don't like paper cupcake holders because I think only cooks who are too lazy to do a good job greasing their pans or to take the time necessary to wash the the muffin cups after use them (I also have a thing about lazy people.) Whatever; as I said, arrogance.
If you look closely at the photo, the outside of the cupcakes are a little too brown, I think. In this instance, I believe the paper cupcake holders would've prevented their overbrowning and made for a prettier presentation.
The heating of the milk with the lemon, butter and vanilla and zest is positively inspired. I wish you could've smelled the aroma of the lemon zest as it infused the milk (I didn't have orange). The wonderful, citrusy aroma woke up Sweetie-Pi and brought him downstairs to see what was smelling so exquisitely good.
These muffins are light, full of tart raspberry flavor with a nice balance of lemony goodness. Perhaps rolling the raspberries in a little sugar before adding to the batter would be good, for those who have sweeter taste buds.
This recipe made 18 standard sized muffins for us, filling the muffin cups half full.
Friday, February 20, 2009
Ginger Creams
No matter how simple the cookie, there's something that makes a frosted cookie special. It's that little bit of extra care, I think, that draws me to them. My Sweetie-Pi knows I am interested in Shaker cooking, and he purchased a cookbook Seasoned With Grace by Eldress Bertha Lindsay. (Now you know why I call him Sweetie-Pi.)
This is a soft, spicy cookie that stays moist for days. Sweetie-Pi and I liked these very much. For maximum enjoyment, you must have a frothy glass of cold milk. The cookies keep very well, but should be stored in an air-tight container, in layers, with waxed paper in between them.
Ginger Creams
1/2 cup shortening
1 cup sugar
1 egg
1 cup molasses
4 cups flour
1/2 teaspoon salt
1 teaspoon nutmeg
2 teaspoons ginger
1 teaspoon cloves
1 teaspoon cinnamon
2 teaspoons baking soda
1 cup hot water
Preheat oven to 350F. Prepare a cookie sheet by greasing well, or better yet, for these cookies, use parchment paper.
In a medium-sized bowl, cream together the shortening and sugar. Add the egg and beat well, and then add the molasses, beat again, until the ingredients are well combined.
In a separate, large bowl, sift together the flour, salt and spices.
In a one-cup measuring cup, dissolve the baking soda in the hot water.
Alternately add the flour/spice mixture and hot water to the creamed ingredients. (What they mean here is, one third of the flour mixture, one half of the water, one third of the flour mixture, the remaining water, and then the remaining flour.) Chill thoroughly. The batter will be very soft and very sticky.
Now, using a teaspoon, drop small amounts of batter onto the prepared sheet, leaving a good two inches of space in between. This batter will spread and it will stick; hence my strong recommendation to use parchment paper. (I tried greasing the first pan, and the cookies clung to the pan and became a total, horrible mess.)
Bake at 350F for about ten minutes. The cookies will be soft, but while they are still warm, frost with icing.
Recipe states it makes six dozen, and it does.
Thin Cookie Icing
2 cups confectioners' sugar
3-4 tablespoons cream
1 tablespoon melted butter
1 teaspoon vanilla
Sift the confectioners' sugar into a medium sized bowl. Add the remaining ingredients and beat well.
Tuesday, February 17, 2009
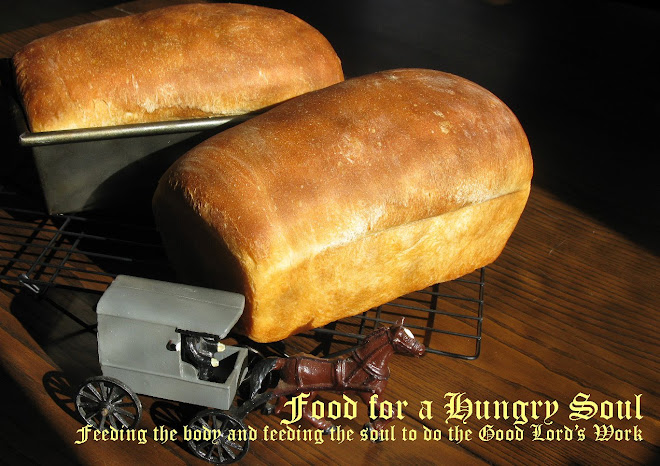
Amish White Bread
I love bread in all its golden, crusty glory! This may be the only way I'll truly have gold in my pans.
I get all zen when I make bread; inner peace just swells inside me as I concenrate on the measuring and the kneading. I take the time to knead it right, until it's smooth as a baby's behind, maybe eight to ten minutes. Whatever trouble that may have been on my mind or in my heart dissipates, vaporizes, as I work the dough into a smooth globe and set it aside to rise. And that wonderful yeasty aroma! Ooooh....make me one with the bread....
I've made this bread at least a couple dozen times, maybe even more, and every time it has been wonderful. The bread is a little sweet because of the sugar, (which can be a surprise to some who are accustomed to, say, a French bread) but I like it. It makes great French toast, ham sandwiches, and of course, thick slabs with creamy butter.
Saturday, February 14, 2009
Roasted Strawberry Shortcake with Whipped Cream Biscuits
Roasted strawberries? Never heard of it. Whipped cream biscuits? I love whipped cream, I love biscuits. Whipped cream topping that includes sour cream? I couldn't resist.
Roasting the strawberries makes them sweeter and deepens their ruby red color. The whipped cream in the biscuits adds a velvety sweetness. The sour cream in the whipped topping adds a delicate tang and body. This is now my designated shortcake recipe. So good!
This gem is in my 2007 Fine Cooking Annual cookbook.
Roasted Strawberry Shortcake with Whipped Cream Biscuits
1 3/4 cups all-purpose flour
1/2 cup plus 3 tablespoons sugar, plus more for sprinkling
1 tablespoon baking powder
1/4 teaspoon salt
1 1/2 cups chilled heavy (whipping) cream, divided, plus more for brushing
2 teaspoons vanilla extract
1 quart ripe strawberries, cleaned, hulled
1/2 cup sour cream
2 tablespoons confectioners' sugar
These biscuits work up pretty quickly. They're best fresh out of the oven, but I ate them a couple of days afterwards, and they still tasted wonderful, though the texture was not optimal.
About an hour before you want these beauties, preheat your oven to 425F. Grease a large baking sheet (I used parchment paper; it's so much neater), set aside.
In a large bowl, add the flour, 3 tablespoons of sugar, baking powder, and salt.
In a separate bowl, beat 1 cup of the cream until the cream can hold soft peaks. Keep a careful eye here, you don't want butter. Lift the beaters, the top of the peaks will fold gently fold over. Add the vanilla and beat until just combined.
Make a well in the center of your flour mixture. Add the whipped cream, and using a fork, stir until the mixture begins to hold together. (This is the secret of successful biscuits; try not to overwork the dough!) Turn the dough out onto a lightly floured surface and knead a half dozen times or so. Pat the dough until it's about 1/2 inch thick. Using a three-inch cookie cookie cutter, cut out a total of six biscuits. Gather the scraps as necessary and reshape. You could also just pat the dough into a nice rectangle and cut with a sharp knife.
Use a bit of cream to brush the tops of the biscuits. Sprinkle with a little sugar. Place the biscuits on the baking sheet and then bake until golden brown about 12 to 15 minutes. Transfer biscuits to a cooling rack.
Roasted Strawberries
Increase the oven temperature to 450F. In a medium bowl add the strawberries with the remaining 1/2 cup of sugar. Toss to coat strawberries with the sugar. Place strawberries and the sugar into a square or oblong casserole dish or baking sheet. Place into the oven, stirring every five minutes or so, for about fifteen minutes. Berries will be soft, sweet, and fragrant.
Whipped Cream
In a small mixing bowl, add the remaining 1/2 cup whipping cream, sour cream, and confectioners' sugar. Beat until soft peaks are formed.
To serve, split each biscuit horizontally (using a fork as if splitting English muffins), and laying the bottom half on a serving plate. Spoon on some strawberries and luscious roasted strawberry syrup, a generous dollop of cream, crown with the biscuit top. A little extra whipped cream and strawberry probably wouldn't be too overindulgent.
Wednesday, February 11, 2009
Baked Eggs in Crepe Cups
During the work week, breakfast is primarily a foraging event --toast, coffee, maybe a bowl of frosted cereal (that would be Sweetie-Pi's choice), leftovers from dinner (that would be mine).
But then the weekend happens, and now we can celebrate the meal.
I have a crepe cookbook that my friend Tim gave me about 15 years ago. I've held onto it all this time, have often looked at it, savored some of the recipes. I've even made one or two recipes out of it, years ago. (Hanging my head in embarrassment here.) Not that it's any real excuse, but crepes just seem so fancy to me. I'm so not fancy. But there's a secret part of me wants to be though; it's my inner child. My inner child is fancy. My inner child is tap dancing for attention. Time to acknowledge her and let her out to play, I decided. What could be more elegant or fancy than crepes for breakfast?
And so I turned to my crepes cookbook and rediscovered this recipe. These crepes are thin, delicate, golden. They were so delicious that I ate my "mistakes" without anything in or on them. They would've been splendid with a dollop of jam.
It does take a wee bit of practice to make a crepe. I don't hacrepe pan, just a small Teflon coated fry pan, about six inches in diameter. A little oil (we're not frying!) in a preheated pan, a little batter, a little swirl. Cook over medium heat. Wait a minute. Turn. That's all there is to it. Pretty much, anyway. As I said, it takes a bit of practice to get it right. I read somewhere that the first crepe never comes out perfect; I think my first four crepes weren't as lovely as I wanted.
Basic Crepe Batter
1 1/2 cups milk
3 eggs
2 tablespoons butter, melted
1 cup all-purpose flour
1/2 teaspoon salt
Combine milk, eggs and butter in mixing bowl. (I used a 4 cup measuring cup so I could pour from it when I needed it.) Beat until well combined. Then add the flour and salt, and beat until smooth. This batter is very thin. Refrigerate for about one hour. You could actually make this batter up to a day or two ahead. Just before you going to use it, give it another good stir.
When you and the pan are ready, with one hand hold the pan off the flame, and with your other hand, pour in about an 1/8 cup of batter into your pan. It will probably take a few trials to determine how much batter to use. Swirl and tip the pan so that the batter evenly coats the bottom of the pan. When the crepe looks dry on the top and the edges have lightly browned, loosen the edges with a spatula. Now, if you have asbestos fingertips, you can help the spatula do its job by gently pulling the crepe with it. Or, if you're fortunate enough to have tongs, they work wonderfully. (I have some wooden ones that I bought at a craft fair, and they are just perfect. Metal ones could easily tear these delicate crepes.) Turn the crepe and cook maybe for another 30 seconds on the second side. You can stack these with waxed paper in between each crepe.
Prepared Crepes (one for each person)
1 egg for each cup
Light cream or half and half
Cooked, crumbled bacon (about 1 tablespoon per serving)
Parmesan cheese
Prepare a muffin pan (not the supersized size muffin pan) by greasing it well. Then take one crepe and line the muffin cup, taking care now to tear it. The crepe is larger than the muffin cup so you'll have to gently fold it in. Break an egg into each crepe-lined cup. Spoon about one tablespoon of cream over the egg. Add one tablespoon of bacon and top that with a good sprinkling of cheese.
Bake in a preheated 325F oven 15 to 25 minutes or until the eggs are done to your liking.
Rave reviews from Sweetie-Pi, and I have to agree. Baked Eggs in Crepe Cups. My fancy inner child is very happy!
Monday, February 9, 2009
Carrot Bake
I really want to like vegetables. Really, I do. It's just that I think they can be so boring. Honestly, if I see one more stack of green beans with a sprinkling of slivered almonds, I think I'll...oh, I don't know...probably just eat them, and just be left wondering if that's all there is.
With Sweetie-Pi's finicky taste buds to consider, there aren't a whole lot of vegetables to expand on. However, that is part of the challenge and the fun for me. One vegetable that we both agree on is carrots. Outside of boiling them or eating them in sticks, what else is there? So, I dug out a half dozen of my favorite cookbooks and settled on one of my favorites, Best of the Best from New England.
I read cookbooks as if they were novels, savoring each recipe, imagining the taste as I read the ingredients and the directions. Sometimes I can read a recipe and know I've found a winner. I know I've seen this recipe a dozen times and have skipped past it every time. The recipe title "Carrot Bake" is just so ho-hum and mundane and uninspiring. When I read the recipe again, I read it with new eyes. I looked past the title and read the ingredients and started to imagine the flavors. Yummmm, I thought.
And now I have found a new favorite way to eat carrots. I like this so much I would serve it to guests. The picture doesn't even begin to do justice. There is a melody of flavor on the tongue. Carrots, onions, green peppers, and a hint of sweetness. And the rewarding part? Sweetie-Pi absolutely loved this!
I wish I could've taken a better picture for you. This was our early Valentine's dinner, carrot bake, filet mignon, and what should've been Duchess potatoes. (Those were a laughable failure; I will not be blogging about those until I get it right. In the meantime, just focus on the carrots. Pay no attention to that mysterious white blob on the right of your screen!) We had a nice Merlot, and a new twist on strawberry shortcake, that could easily become the way I make all future shortcakes.
Carrot Bake
9 or 10 large carrots
1/4 cup chopped green pepper
1/4 cup chopped onion
4 tablespoons butter
2 tablespoons flour
1 cup milk
1/2 teaspoon salt
2 tablespoons sugar1/2 cup soft bread crumbs
Peel and slice the carrots. In a medium pan, with just enough water to cover the carrots, cook over medium heat until tender. Mash. (Now this is February in New Hampshire. The carrots were woody, unpleasantly fibrous, so I had to pulse them in a food processor.) Set aside.
In a small saute pan, melt four tablespoons of butter. Add the flour, milk, salt and sugar and cook until thickened. (To avoid lumps, I made a slurry with a portion of milk and all the flour and then added it into the pan with the vegetables and milk.) Add the reserved carrots and transfer all to a greased casserole dish. (Because there were a number of prepatory steps, I worked the recipe to this point, covered with plastic wrap, and then refrigerated, About 45 minutes before I wanted to serve dinner, I took the casserole out of the fridge and continued with the recipe.)
Melt the remaining one tablespoon of butter in a clean saute pan and add the bread crumbs. Toast the crumbs over medium heat, stirring constantly, until the crumbs are a golden brown. Then sprinkle those wonderful buttery, toasted crumbs over the casserole.
Bake at 350F for 30 minutes.
Prepare to swoon.
Wednesday, February 4, 2009
Mile High Pancakes
I like pancakes in general, the kind you can get at a truck stop or diner, the kind at a pancake house, the kind my mom made. Sometimes though they can sit in my stomach, and I feel so uncomfortable that I am left wondering why I thought it was a good idea to eat them.
Here's a simple recipe that I discovered on Recipezaar. With the one tablespoon of baking powder in the ingredients, the pancakes that are so light and fluffy that they almost float off plate. I've renamed the recipe to better describe their quality.
Mile High Pancakes
1 egg
3/4 cup milk
2 tablespoons butter, melted
1 cup flour
1 tablespoon sugar
1 tablespoon baking powder (that's right, l tablespoon)
1/2 teaspoon salt
In a medium sized mixing boil, beat the egg until fluffy. Add milk and melted butter (okay, use margarine if you have to, but we use butter in this house), mix until combined. Add dry ingredients and mix just combined. (At this point I added a tad more milk because I thought the batter was too thick, and I wanted a thinner pancake.) The batter will start to foam up into huge bursting bubbles, but that's a good sign; it means your baking powder is working and your pancakes will have the loft you're looking for. Do not overbeat; overbeating will deflate your batter.
Heat a heavy griddle or fry pan which has been greased with a little butter or vegetable oil on a paper towel. The pan is hot enough when a drop of water breaks into several smaller beads which 'dance' around the pan. Or, you if you have one, you can use an electric fry pan or griddle, heated to 375F.
Pour a small amount of batter (about 1/4 cup) into pan and spread in a circle with the back of a spoon or spatula (the kind used to frost a cake). When bubbles appear on surface and begin to break, and the edges look dry, turn over and cook the other side. You can also slightly raise one corner and see if the color is to your liking.
If you really want to make it nice, warm the maple syrup and serve in a nice pitcher.