Do you remember this old Weight Watcher's recipe? Spaghetti squash virtually replaces all the high calorie, high fat coconut and you still have a delicious coconut custard pie that satisfies that dessert craving. As spaghetti squash tends to take on the flavors around it, its flavor is barely discernible. Ole Sweetie-Pi, who doesn't like squash anything, liked this.
Start by preparing your spaghetti squash. I cook mine whole. There are a number of ways to prepare it. You can boil it whole in a pot of water for about an hour or until it pierces easily with a knife. Or place on a baking sheet, and bake at 375F for an hour, or you can put it on a microwave safe dish, microwave it on high maybe for 15 minutes or so. If you choose to bake or microwave it, make sure and pierce it all over to let the steam escape or you might have a squash explosion from the steam that builds up inside the squash. You can also cut the squash into half and proceed, which will reduce preparation time, but you will need a sharp cleaver and the arms and strength of a WWF wrestler.
Once it's softened, let this cool, as the squash will be too hot to handle comfortably. Once cool, you can cut it open, scrape out the seeds and stringy stuff, discard them, and what you have remaining is some nice pulp. With a fork, scrape out the pulp, (it should come off in nice shreds) and proceed with the rest of the recipe. I made the squash the night before, let it cool overnight.
Whew! The good news is, this pie needs no crust!
Now for the pie recipe.
Spaghetti Squash-Coconut Custard Pie
2 cups skimmed milk
6 tablespoons flour
2 teaspoons baking powder
1/4 teaspoon salt
4 eggs
1 teaspoon vanilla extract
1/2 teaspoon coconut extract
1 cup cooked spaghetti squash
A little grated coconut to sprinkle on top
Put all ingredients (except the spaghetti squash and the coconut) into a blender or food processor (or just mix well in a large bowl). Blend or process for three minutes until smooth. Stir in squash. Pour into a deep-dish 9- or 10-inch pie plate. Sprinkle a little coconut on top. Bake at 350F for 40-45 minutes or until a knife inserted in the center come out clean.
Now, you'll notice that this recipe does not call for sugar, so for me it was not quite sweet enough. I think I'll add a small amount of coconut into the batter to add sweetness and also to amp up the coconut flavor because my favorite part was those little bits of coconut that were sprinkled on top.
Grins. Is that defeating the purpose of the recipe?
Monday, June 29, 2009
Saturday, June 27, 2009
Pepper Bean Salad
I receive a terrific catalog in the mail from the Penzey spice people and they typically have some very tasty recipes. This is not a commercial for them, but in my opinion, if you want that little something that makes a big difference, try some really fresh spices in your cooking. The flavors are much more vibrant.
Their last catalog featured a pepper bean salad that I couldn't wait to try the moment I saw it, plus I had some fantastic Smoked Serrano Sea Salt that I had won from Girlichef when she was having a giveaway. I felt this would be the perfect recipe to try it out in and I was right. This is one mighty powerful salt! It's nothing like that wimpy stuff you probably have in your salt shaker right now. The smoked serrano gives it a little kick and the salt flavor is assertive. For me (a spice wimp) a little goes a long way, but I liked it!
This pepper bean salad (also called Texas Caviar, I believe) has a ton of flavor, texture, color, goodness. There is a fiesta going on in your mouth when you eat this. You will want to do the tango and the cha cha when you eat this.
Pepper Bean Salad
1 15-ounce can black beans, rinsed and drained
1 15-ounce can kidney beans, rinsed and drained
1 15-ounce can pinto beans, rinsed and drained
1 15-ounce bag frozen super sweet niblet corn or 2 cups fresh corn-on-the-cob kernels
1 red onion, chopped
2 garlic cloves, chopped
1 red bell pepper, seeded and chopped
1 green bell pepper, seeded and chopped
2 jalapeno peppers, seeded and chopped
Dressing
1/2 cup chopped cilantro
1 teaspoon ground cumin
1 tablespoon Aleppo pepper (I swapped this out for 1 teaspoon of the Serrano sea salt)
1 teaspoon ground pepper
1 teaspoon sea salt (see above)
1/4 cup canola oil (I use grape seed oil)
1/2 cup red wine vinegar
2 limes, juiced (about 1/4 to 1/3 cup)
1 1/2 teaspoon sugar (my addition)
In a large bowl, combine all ingredients except those for the dressing. (After I rinsed and drained the beans, I left them in a colander so they could continue to drain while I cut up the vegetables and then added them to my bowl.)
In a jar with a tight fitting lid, combine all the dressing ingredients and shake well. Just before serving add the dressing to the salad and mix gently, but thoroughly.
Now, I don't like cilantro. I want to; I think I should like it; and I buy it with the expectation that I'm going to like it this time. I shopped up maybe a tablespoon of it as fine as I could get it, and added it to the salad. Know what? Still can't stand the stuff. Now I have to go through the salad and pick it out speck by speck.
Serves many. I'm going to be eating this for lunch next week, I think; but it's so good (except for that pesky cilantro), I'm looking forward to this! I think it can only get better as it sits. YUM!
Thursday, June 25, 2009
Raspberry Chocolate Crescents
Every now and again I crave a little sweet, typically after I have lunch during the work week. I'm very fortunate that I work for a company that lets me work at home full time, so when the mood strikes, I can just run to my kitchen, grab a treat and run back to my desk and computer.
Usually what I want is a cookie. Two cookies. I love cookies. Cookies are such a delightful, portable treat, not messy to eat and satisfy my sweet tooth without overindulgence.
I made these Raspberry Chocolate Crescents the same day I made the Apricot Power Bars (posted below). Poor Ole Sweetie-Pi has a nut sensitivity so he can't go near anything with nuts, and it just seems unfair that I should have something sweet and he doesn't. He loves chocolate, will help me eat any boxes of chocolate I may get for gifts at the holidays, will treat himself to a candy bar after enduring the trauma of a Wal-Mart shopping trip. He will stash bags of chocolate candies in the bread box.
Word from the galley is that these cookies are among the best cookies I've made.
Now, I'm glad Ole Sweetie-Pi liked them, and I would make them again for him, but I thought they were "just okay." I can't explain exactly what I didn't like them as much as I thought I would. I mean, really, chocolate and raspberry!
I think the chocolate chips in the famous yellow bag were not the best choice, perhaps a better chocolate, such as the Ghirardelli or even those little Dove candies would have been better for this classy little cookie. I also used a raspberry jelly, and I think a raspberry preserve or jam might have been better. The jelly liquefied and leaked out my cookies. I liked the cookie portion of it; it has a slight tang from the cream cheese, and it is nice and tender.
I would love to serve these at a tea party on a tray with other little sweets.
Do you take lemon or milk?
Tuesday, June 23, 2009
Sourdough Waffles & Blueberry Sauce
Until these so-light, they-almost-float-off-your-plate sourdough waffles, I have never had good luck with sourdough anything. The minute I saw these on Coleen's Recipes blog though, I just I just had to try again. I had been craving waffles for breakfast, so I took this as an omen.
Excuse me if I speak while my mouth is full, but I must say, "Oh my!" Light, airy, crunchy, slightly tangy, good! Ole Sweetie-Pi, who never eats eats a whole waffle, ate an entire one in record time and declared that we must have this again.
Grins. My waffles are a bit overdone, (Coleen's are far more gorgeous!), but I was hoping to capture the crispy goodness of these. Check our her pictures for a better idea.
Now I just have one addendum to Coleen's excellent instructions. What I didn't consider is that the batter would rise like the sun at dawn. It started to spill out of my pitcher and onto the counter. Fortunately, I was standing in the kitchen when it was just undulating over the sides and I was able to throw the batter into a much larger bowl. The batter does stop rising after a bit, but plan on having a container maybe three to four sizes larger than your starter.
I had some frozen blueberries in the freezer and decided to make wonderful, full of rich blueberry flavor sauce. I declare, this tasted blueberrier than fresh blueberries!
Blueberry Sauce
In a small saucepan, combine 1/2 cup sugar, 1 tablespoon cornstarch, a good pinch of ground nutmeg and a dash of salt. (That equates to about an 1/8 teaspoon of nutmeg and even less than that for the salt.)
Stir in 1/2 cup of boiling water; cook and stir until bubbly, about two minutes or so. The mixture will be thick and clear.
Add 1 cup of blueberries and return to boiling. Cook until the blueberries begin to burst and remove from heat. Stir in 1 tablespoon lemon juice. Pour into a serving dish and serve.
This is so good warm and so much better than any store-bought blueberry sauce I've ever had. Makes 1 1/2 cups.
Saturday, June 20, 2009
Apricot Power Bars
When I visit your blogs and see all your healthy recipes with fresh, low fat ingredients, I think I must do better.
Inspired by Finsmom at Latest Addictions, I went out and to see if I could buy hemp seed, not expecting to find it in our little city. However, I was proven wrong because in our downtown health food store, it was there ~ $10.00 for a little bag. I hemmed and hawed over the purchase and finally just went with it.
I knew how I wanted to use the hemp seed as I had found these Apricot Power Bars a while back and had dismissed them; they were just a little too earthy crunchy for this sugar and carb girl. Little did I know I would be revisiting them, preparing them, and liking them a lot!
I wouldn't say these bars have a big flavor; I think the recipe, for my taste, needs more cinnamon. However, that hasn't stopped me from snitching off pieces as I walk by them. The bars are chewy, nutty, and not too sweet. They are quite satisfying, and surprise, they are filling. They probably won't replace my favorite cookies, but I am very happy to be able to balance my sweets with a treat that has some true food value.
Apricot Power Bars
1 cup dried apricots
1 cup pecans (I used 1/2 cup pecans and 1/2 cup hemp seed)
1/2 cup walnuts
1/2 cup honey
1/4 teaspoon cinnamon
1/2 cup rolled oats
2/3 cup flour (I used 1/3 cup all purpose white flour and 1/3 cup organic whole wheat)
2 tablespoons vegetable oil
apricot nectar (or apple juice)
Preheat oven to 325 degrees F.
Chop apricots and nuts. Add remaining ingredients except the apricot nectar. Stir to combine and then add enough juice (2 to 4 tablespoons) to form thick batter.
Press firmly into an 8x8-inch square greased pan. Bake 30 minutes or until firm.
Cut into 12 bars and let cool in the pan. Prepared bars can be stored in the refrigerator for 2 weeks or in the freezer for up to 3 months.
I may as well confide to you. While I was out buying hemp seed, I also bought an herbal face cream, guaranteed to plump out even my deepest wrinkles. I figure if I'm eating healthier for my insides, I may as well go for that youthful glowing skin for my outside. Ole Sweetie-Pi is still laughing.Tuesday, June 16, 2009
Favorite Apple Crisp
I have to laugh at myself. With all the fresh, sweet, luscious berries now available, what do I want? Apple crisp. Apple season is still months away and the apples I purchased were rather sad, but that didn't stop me from wanting to make one of my all time favorite desserts. Gosh, I love apple crisp. I have an unreasonable addiction to this brown sugar, oatmeal, and apple concoction.
The first time I had this, I was in elementary school; the lunch ladies served (what I felt were) stingy portions in little beige-speckled melamine bowls. I would trade my 35-cent hot lunch for someone else's apple crisp. My love affair with this sweet dessert has not waned.
I still don't make apple crisp as good as the school lunch ladies, but so far this is my favorite recipe. Maybe I need to wear a hair net.
Apple Crisp
3/4 cup quick oatmeal
3/4 cup brown sugar
1/2 cup butter (or margarine), plus a little additional for greasing the baking dish
1/2 cup flour
1 teaspoon cinnamon
4-6 apples (Macintosh are terrific if you have them)
Butter an 8 x 8 inch (or 9 x 9 inch) baking dish.
Peel and slice apples as you would for an apple pie.
Combine the other ingredients, but leave the mixture crumbly. Sprinkle over the apples.
Bake at 350F for about 35 minutes or until a knife easily pierces the cooked apple. Can be served hot with ice cream. Equally delicious cold.
I was talking with a friend of mine about the school cafeteria apple crisp and she gave me a great tip. She said she used to be a lunch lady, and at the school where she worked, they used canned apple pie filling (received from government surplus and provided to schools in support of the hot lunch program). And all this time I thought the lunch ladies were out back peeling all those apples!
Sunday, June 14, 2009
Hershey's "Perfectly Chocolate "Chocolate Cake & 7-Minute Frosting
My Ole Sweetie-Pi just turned 61, and when asked what kind of cake he wanted, he requested the same cake that his mother made and the one that he's wanted through the years, chocolate cake with 7-minute frosting.
I have several favorite chocolate cake recipes that I turn to again and again; one of them is the back of the can recipe on the Hershey's Cocoa can, "Hershey's "Perfectly Chocolate" Chocolate. Cake. This cake is moist, dark, chocolately, and truly deserves its name.
Hershey's "Perfectly Chocolate" Chocolate Cake
2 cups sugar
1 3/4 cups all purpose flour
3/4 cup Hershey's Cocoa
1 1/2 teaspoon baking powder
1 1/2 teaspoon baking soda
1 teaspoon salt
2 eggs
1 cup milk
1/2 cup vegetable oil
2 teaspoons vanilla
1 cup boiling water
Heat oven to 350F. Grease and flour two 9-inch round baking pans.
Combine dry ingredients in large bowl.
Add eggs, milk, oil and vanilla. Beat on medium speed 2 minutes. Stir in boiling water (batter will be thin).
Divide equally between two pans.
Bake 30-35 minutes or until wooden toothpick inserted in center comes out clean. Cool 10 minutes. Remove from pan to racks. Cool completely. Frost. (Because this cake is so moist, be careful when handling it, it likes to stick to the cooling racks.)
This cake is a good keeper; even after three days, it will still as moist as it was on the first day.
Seven minute frosting is not my personal favorite to eat or to prepare. It's sweet, sticky, (like marshmallow fluff) and can be a little cantankerous to get it to the point where you can use it. (The first time Ole Sweetie-Pi asked me for this frosting, I panicked because I had heard how difficult it could be.) Take your time, follow the directions, have your ingredients, bowls, pot, hot water and beater ready; be prepared to stand over it while it's being beaten, (depending on weather, it may take longer than 7 minutes, today it took 15 minutes because it was cold and rainy outside!) and it should work.
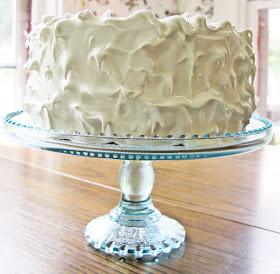
Once it's on the cake, it's positively beautiful. It's glossy, fluffy, understated splendor. With just a flick of my offset spatula, I can make little pulls and peaks in the frosting that make me look as if I know how to decorate a cake (which I most assuredly do not!). This is probably the prettiest cake that I make.
Seven-Minute Frosting
2 egg whites
1 1/2 cups sugar
pinch of salt
1/3 cup water
2 teaspoons light corn syrup
1 teaspoon vanilla
Combine all ingredients except vanilla in the top of a double boiler. Beat one minute or until thoroughly mixed. Then place this over boiling water (making sure the bottom of the pan does not touch the boiling water) and beat constantly at high speed of an electric mixer for seven minutes (frosting will stand in stiff peaks--you may need to beat it longer to reach this point).
Occasionally stir the frosting from the bottom and sides of the pan to ensure that the frosting is well combined.
Remove the pan from the boiling water and pour at once into a large bowl. Add the vanilla and beat one minute, until thick enough to spread.
You should have enough to generously cover tops and sides of two 8- or 9-inch layers, sides and tops, or a 10-inch tube cake.
This frosting is best enjoyed the day it is made. It starts to droop and crystallize on the second day.
I do not have a double boiler. I use a Pyrex bow with a rim of that sits nicely outside the rim of one of my pots. I do need oven mitts to remove the bowl, but that's a small inconvenience for the cost of a single-use pot, considering I have limited storage space.
Next year when Ole Sweetie-Pi is 62, we'll be having "Perfectly Chocolate" chocolate cake and 7-minute frosting. It's a delicious tradition.
Saturday, June 13, 2009
What To Do With Leftover Meatballs
What to do with leftover meatballs? Well, we make meatball submarine sandwiches. The meatballs that we had from last night's dinner make a terrific sub. I reheated them in the microwave, added provolone cheese, a dill pickle, and it was a terrific deli lunch at home.
I don't care to buy the packaged sub rolls because there are too many, and the bread is too soft and squishy, so instead I opted to make my own sub rolls. I tried this recipe from the Red Star Yeast site as it only made one loaf of French bread. I just divided the dough into four equal portions and shaped each portion into a six-inch loaf. It made a nice sized sub roll. The outside was chewy; the inside soft.
I hollowed out the inside of the roll to make a little valley to put in my meatballs in (saving the bread for crumbs). I think it would have been fun to add some garlic and cheese to the bread dough, to give it more of an Italian sub shop flavor. I'll do that next time.
Now to think of something to do with those fresh bread crumbs.
Friday, June 12, 2009
Baked Manicotti, Tomato Sauce & Meatballs
When my husband was alive, he worked for a small printing company south of Boston. Any number of interesting political, entrepreneurial, business owners, the scandalous and the saintly, would cross his threshold for printing needs. One of the nicest folks were the Dragone ricotta and mozzarella cheese folks. In the process of order taking, my husband learned they had a booklet of recipes using their products, and for a discount on their printing services, he obtained the booklet for me (after mentally inflating the price by ten percent and then offering them a ten percent discount; I leave it to you to decide if he were scandalous or saintly). It has been this booklet that I have referred to for some of the best authentic Italian cooking that I know.
To start, I do not buy the manicotti tubes; I cannot figure out how to stuff them neatly without the tubes splitting down the side or having big gaping holes where the cheese was not tamped in far enough. Thankfully, Dragone did include a crepe batter recipe, which works like a charm and gives me the added satisfaction of presenting something homemade.
Crepes for Manicotti
1 cup flour
1 cup milk (or more as needed to achieve a thin-pancake batter consistency)
1 egg, beaten
1/2 teaspoon salt
(each mixture makes 8-9 manicotti shells)
Stir milk gradually with flour until smooth Add, stirring constantly, the beaten egg to which the salt has been added. For each shell, brush a preheated 6-inch frying pan with olive oil, and pour 1/4 cup of the batter into the pan, tilting back and forth so that it spreads evenly.
When set on one side, turn and let the other side set. Slide off pan onto a clean work surface or dish and repeat until batter is used. (I separate the crepes with a piece of waxed paper to prevent them from sticking to each other).
Let cook slightly, then place 2 tablespoons of filling in the center of each crepe, (I usually make a cheese "log" as I like a lot of cheese) bringing the sides over so that they overlap the filling. Arrange side by side in a baking dish, cover with tomato sauce and sprinkle with grated Romano or Parmesan cheese.
Manicotti Filling
1 pound ricotta
2 eggs
1/2 pound mozzarella
1/2 cup grated Romano cheese
salt and pepper to taste (taste the mixture before adding the salt; the cheese is already salty)
(you can also add 1/4 pound chipped Italian ham)
Combine all ingredients in a bowl, mixing well to combine. (Yes, I am still brand loyal to Dragone after all these years.)
Tomato Sauce
Everyone has their favorite; this is my go-to tomato sauce for just about everything that needs a tomato sauce. If I were to make a cacciatore, I would start with this sauce and add peppers and larger hunks of onion. For Spanish rice, add the necessary spices, black olives, etc. and add it to the rice. For a meat sauce, add 1/2 pound each ground hamburg and Italian sausage (casing removed).
3 tablespoons olive oil (a couple of good swirls)
1 small onion chopped (I like onion, I add 2)
1 clove garlic
1 teaspoon parsley
1/2 teaspoon basil
1/4 teaspoon thyme
1/2 teaspoon pepper
1/2 teaspoon sugar
1 large can Italian tomatoes
1 can (6 ounces tomato paste)
1 small carrot grated (to add natural sweetness and a well-disguised veggie!)
salt to taste (start with 1/2 teaspoon and adjust)
Heat oil oil in sauce pan, add onion, garlic and spices. Cook, stirring frequently, until the onion is translucent but not browned.
Add remaining ingredients and simmer gently for about 45 minutes. Taste for seasoning. Tomatoes can be a little acidic, so you may need to add a pinch more sugar. If the sauce seems too thick while it is simmering, add 1/4 cup of hot water.
Meatballs
I found this meatball recipe on Recipezaar and they are just about perfect. I never fry my meatballs, opting to bake them in the oven when I bake my manicotti or lasagna. I think they hold up much better; I just serve them on the side or add them to my tomato sauce, depending on what I'm doing. I've shared this recipe with a couple of friends and we all agree, these are mighty fine.
They make a terrific addition to a meatball sub. Catch my next post.
Wednesday, June 10, 2009
Blueberry Tea Cake
With the blueberries in such great abundance, I could not resist sharing this simple little recipe. I've had it years and years and have made it numerous times; it's a recipe I pull out when I have friends and family to share my breakfast table. This fluffy, blueberry studded little cake is simple, works up quickly, and just makes a darling breakfast treat or, no surprise, with tea!
Blueberry Tea Cake
5 tablespoons shortening
1 cup sugar
2 eggs, beaten
2/3 cup milk
1 3/4 cups flour
3 teaspoons baking powder
1 1/2 cups blueberries, rinsed, drained, tossed with a little flour and sugar
Preheat oven to 375 F. Generously grease an 8 x 8 inch baking dish.
Cream shortening. Add sugar, beaten eggs, and milk. Sift the flour and baking powder, add to the wet ingredients, and mix well. Fold in the blueberries into the batter and pour into the prepared baking dish. For a little extra sparkle, sprinkle sugar on top.
Bake for about 25 minutes or until a tester inserted in the center comes out clean. (You may have to cover with tin foil at some point if the center isn't cooking as fast as the rest.)
Sweet with a rush of blueberry tartness! Love it.
Monday, June 8, 2009
Steamers
Summers on Cape Cod introduced me to that well known plate, the clambake, a feast that was a herald of the quintessential seashore summer. Platters, heaped high with just-off-the-boat lobster, freshly dug clams and mussels, farm fresh corn on the cob, potatoes, bowls of real butter and lemon wedges, steaming and smelling of the Atlantic Ocean, would be placed before you. Sweet abundance of the sea! You were probably given a plastic lobster bib and those little wet-dry towelette packets, because you are going to get buttery and juicy. This is a get-down-to-it with your fingers, lean-over-the-platter, catch-the-butter-and-meat-in-your-mouth-before-it-all slips-and-slides-away meal. This is a meal best shared with family and friends with whom you don't mind being seen at your messy best.
Begin by thoroughly rinsing the fresh steamers. Hold a steamer under fresh running water; most of the sand will wash out. Brush any loose sand that may be clinging to the shell. Discard any uncooked steamer whose shell is open (it's already dead and you don't want it!). I put them in a bowl with some fresh water, a little salt, and rinse an additional three or four times. Some folks add a tad of cornmeal, the idea being that the clams will eat it and then clean out their digestive system. I try not to think too much about that.
It's all so simple, you don't need a recipe. Allow about 1/2 cup of water for every 4 quarts of steamers. I use a steamer pot, the kind that has a separate insert that is made to steam foods. (When I didn't have a steamer pot, I used a large soup pot and a steel colander.) Add maybe a teaspoon of sea salt or kosher salt. Cover, bring the water to a boil. Add your corn if you're going to serve it, and let it steam for about 10-15 minutes. Add the raw clams on top, recover the pot, and allow to steam an additional ten minutes or so. It's okay to check off and on because once the clam shells are opened, they are done! Do not overcook or you will believe you are eating the tires off your car.
Folks add any number of things in with their steamers, kielbasa comes to mind. It's all good, but different foods take different lengths of time to cook or heat through, so you'll have to cook in layers, with the longest cooking item going in first.
If you're a true Cape Codder, you will reserve the broth (perhaps adding a bit of butter or lemon) to serve separately so that you can dunk thick hunks of crusty bread into it.
Remove the unappetizing skin covering its dark neck and any strands of seaweed that may still be clinging to the hinge or muscle. Dip in hot melted butter and enjoy fruta del mar, fruit of the sea!
Saturday, June 6, 2009
Very Blueberry Pie
Ever been blueberry picking, hot sun beating down on you, pail in hand, picking blueberries, maybe with mosquitoes buzzing around you. Mysteriously, an equal amount of those luscious blue-purple globes found their way to the bucket and to your mouth. And when you bit down on them they squirted their sweet tart juice down your throat and you knew you were eating sunshine. It was like that for me. My grandmother used to take me on an old logging road near her home, and we followed it alongside the little brook that separated her property until we arrived at her secret blueberry patch. There we would eat like two mischievous children, coming come back with with only a brimming bowlful, enough to make a pie.
I love blueberry pie, but so many of them are thick with crust and starchy filling. I'll eat them, can't say no, but if you LOVE blueberries, don't want a lot of ingredients between you and those wonderful globes of goodness, try this Very Blueberry Pie. Nothing but a mound of whipped topping is between you blueberry heaven.
I clipped this recipe out of a grocery store pamphlet some years ago. The recipe instructions call for salt, but it's not included in the ingredient list. I've Goggled the recipe and can't find this precise one so I add a 1/4 teaspoon. Seems to work fine.
Very Blueberry Pie
1/4 cup cold water
5 tablespoons all-purpose flour
1/4 teaspoon salt
4 cups fresh or dry-pack frozen blueberries, rinsed and drained
1 cup sugar
1/2 cup water
1 baked 9-inch pie shell (recipe to follow)
Make a smooth paste with the 1/4 cup cold water flour and salt and set aside.
Boil 1 cup blueberries with sugar and 1/2 cup water. Add the flour paste*** and stir until thickened. Remove from heat and cool.
Add the remaining blueberries. Put into baked pie shell.
Refrigerate. Serve with sweetened whipped cream.
***When I followed these directions, I had a horrid lumpy floury ball that seized in the middle of my blueberries. I stirred and stirred, the mixture did thicken up, but there were unsightly strands of flour throughout. I ended up putting the mixture through a fine sieve and then tossing away a floury mass. The syrup was smooth and thick, but it would've been better if if were thicker. I haven't made this recipe in a while and I don't remember this happening the last time. If you have any ideas how to avoid this in the future, I'd be glad to adopt it. Perhaps the flour/water mixture needed more water?
Because this pie needs one prebaked pie crust, I went to Allrecipes and found Easy Pie Crust and the submitter isn't kidding; this crust is super easy. You make the crust right up in the pie pan you're going to use, pat it around the sides and bottom, and then bake. No rolling out. No extra dishes to wash. It's an acceptable crust, and it worked well. I think a rolled crust is better tasting and has a better texture. This one was kind of crumbly, almost like a cracker crumbly. I reduced the salt and added extra sugar as some reviewers suggested, but I thought it was too sweet. Would I do it again? Perhaps. But if I saw another similar recipe I wouldn't hesitate to try it.
Wednesday, June 3, 2009
Pineapple Coconut Squares, Rolo Cookies, Cherry Tartlets and a Dip
When I visit your blogs or recipe sites, it is without fail I find something new, different, delicious, and with each delicious discovery, I promise myself, I am going to make this. My collection grows everyday, but it's the rare opportunity that presents itself where I can have a cookathon. So when my employer announced a department meeting, I immediately seized the opportunity to make several different recipes and offered to bring treats.
On the left, are Rolo Cookies. Love chocolate cookies? Love Rolo candies? Then I encourage you to try these. There's a surprise, melty, chocolately, caramely surprise in the center of each cookie. These were a huge hit with my co-workers.
This little tartlet-cheesecake recipe has been around a long time; I made these back when I was first learning how to cook. They were well received then, and times haven't changed. People who love cheesecake, love these. And boy are they ever easy and quick to make! I used a Paula Deen recipe, but I charge it up by adding a couple of good swipes of fresh lemon with my microplane. Believe me, it makes all the difference. I made these in the tinfoil cupcake holders (the kind that don't need to be put in a muffin cup first) and was able to make 24 little tarts. They are a showstopper.
Now the last thing I made I'm rather embarrassed to mention, but it's so tasty and simple that I want to share it with you. It has to be the simplest fruit dip. Two ingredients. Two 8-ounce packages of cream cheese, softened, and a jar of marshmallow fluff. Put both ingredients in a bowl, stir until well combined. That's it. Soooo good and so easy. I found a couple of inexpensive red, star-shaped bowls at Wal-Mart. Put the dip in one and my beautiful, ruby red strawberries in the other.
Just a yummy day from beginning to end!
On the left, are Rolo Cookies. Love chocolate cookies? Love Rolo candies? Then I encourage you to try these. There's a surprise, melty, chocolately, caramely surprise in the center of each cookie. These were a huge hit with my co-workers.
I was up at 4 o'clock this morning putting together, a sweet discovery, Pineapple Coconut Squares, Yummm...the house smelled like a tropical paradise while these were baking. None of these came home with me. I found this keeper recipe on Trish's blog, The Mad Chemist. All of Trish's recipes are mouth-watering good! She's a diversified and talented cook and a gifted writer as well. When you visit her site, it's as if you've been invited to sit with her in her kitchen.
This little tartlet-cheesecake recipe has been around a long time; I made these back when I was first learning how to cook. They were well received then, and times haven't changed. People who love cheesecake, love these. And boy are they ever easy and quick to make! I used a Paula Deen recipe, but I charge it up by adding a couple of good swipes of fresh lemon with my microplane. Believe me, it makes all the difference. I made these in the tinfoil cupcake holders (the kind that don't need to be put in a muffin cup first) and was able to make 24 little tarts. They are a showstopper.
Now the last thing I made I'm rather embarrassed to mention, but it's so tasty and simple that I want to share it with you. It has to be the simplest fruit dip. Two ingredients. Two 8-ounce packages of cream cheese, softened, and a jar of marshmallow fluff. Put both ingredients in a bowl, stir until well combined. That's it. Soooo good and so easy. I found a couple of inexpensive red, star-shaped bowls at Wal-Mart. Put the dip in one and my beautiful, ruby red strawberries in the other.
Just a yummy day from beginning to end!