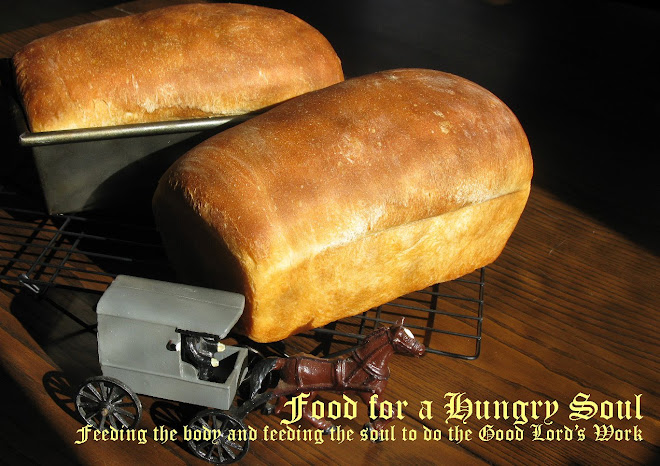
This crusty Italian loaf has to be the easiest, crustiest, and one of the tastiest loaves I have ever made. It is now one of my go-to loaf breads. And if that's not enough, there's no kneading. Just stir the ingredients together, wait four hours for the dough to rise on your countertop, shape into a rough loaf, baguettes, rolls or even pizza, and bake.
Nonna's Crusty Bread
(www.isicilian.bonrepublic.com)
4 cups, all-purpose, unbleached flour (I used King Arthur's flour)
1 teaspoon salt
1 teaspoon yeast
2 cups warm water
Oven-proof baking dish or casserole containing 2-3 cups of water (to be used while baking the bread)
Combine the dry ingredients for the bread in a large bowl. Add the 2 cups of warm water and stir to combine and forms a sticky mass.
Cover the bowl and allow the bread ingredients to rise for about 4 hours on your counter. The surface of the dough will have bubbles about 1/4 inch in diameter.
Preheat your oven to 500*F. Put your bakeware with the 2-3 cups of hot water in the oven. Line a cookie sheet with parchment paper and set aside.
Dump your dough out onto a well-floured surface, covering the outside surface with flour as the dough is wet and sticky. Handling the dough as little as possible (you're trying not to burst the bubbles) , shape your dough into your desired shape.
Bake in your preheated 500*F oven for 60 minutes, or depending on your oven, more or less time. For me, I found that 45 minutes was ample, but I also note that the ISicilian's bread is much darker than mine. I chickened out at 45 minutes, fearing that my bread would burn to a crisp.
For more hints about using this dough, I suggest you visit the post for Nonna's Crusty Bread. She has suggestions for keeping the dough in your refrigerator and for reheating the bread.


What a magnificent loaf! I like this twist on no knead bread, and I am going to make it next loaf! Thanks for this inspiring post :)
ReplyDeleteYum! This sounds SO simple and looks gorgeous! I was thinking about making my grandma's minestrone soup next week and this would be PERFECT with it!
ReplyDeleteWhoa! I would NEVER have guessed that this was no-knead! Looks amazing!
ReplyDeleteOh, I love a good crusty loaf of bread! I can't wait to try this! Thanks for sharing the recipe.
ReplyDeleteLove, love love a good, crusty bread- I'm going to make this sometime this week. It looks fantastic Katy!
ReplyDeleteI love a good crusty loaf of Italian bread myself! Grumpy loves it when I make cheesy garlic bread with it. So yummy! Your loaf of bread makes me want to make it myself again!
ReplyDeletemmmm, i love the look of this bread. i need to get my husband this recipe stat so he can make this for me!
ReplyDeleteDelicious..I love breads and this one's begging to be be made..like right now:) Thanks Katy.
ReplyDeleteWow Katy, that bread looks fantastic. I love a good, crispy crust. I also have a fear of yeast and have always avoided making homemade bread but this one really sounds easy! Thanks for posting this!
ReplyDeleteFirst time in your space..But I love it..will be back for sure
ReplyDeleteHi Katy! I just had a chance to bake this wonderful bread -- my first foray into bread making since the age of 10. (I won't say how many decades ago that was!) Thank you for sharing this easy recipe. It turned out beautifully, giving me the courage to try again, and again, and again. ;-) Love your blog!
ReplyDeleteShari, HUGS!! Glad you enjoyed this. You make me smile BIG!
ReplyDeleteYou all do!!!
Blessings.
Katy
I just became your follower as I love your breads recipes. My hubby makes this very same bread taught by an Italian family that lived in his granfather's farm cultivating grapes. He makes it exactly, he's so happy because your recipe has perfect ingredients weights, his is by the eye. I'll let you know when he tries it. Thank you again. FABBY
ReplyDeleteI made this last night and it tastes wonderful! I had them in for 1 hour, but like you I think next time I will remove them at 45 minutes, parts were a tad too crunchy but even those will delight the birds when I share with them. Thank you very much for sharing!
ReplyDeleteWhere do you put the dish with the water relative to the bread when it's in the oven?
ReplyDeleteEven though I sent you a personal email, I thought I'd answer here for anyone else who asked this excellent question, smiles. Depending on the width of the dish I'm using, I either put it on the lowest possible rack or on the floor of the oven itself. The top of the loaf should be at the halfway point in the oven, so if I use a tallish pan for the pan there may not be enough space between the racks. I center the bread pan over the water to try and get the steam to surround the loaf. Some folks spray a fine mist of water into their hot oven, the folks at King Arthur's Flour (so I've heard from a former employee there) use a cast iron pan that is heated with the oven, and drop ice cubes into the hot pan. Some folks just LIGHTLY mist the loaf a couple of times during the first 10 min of baking. Whatever you do, try not to drown the dough in too much humidity.
ReplyDelete